


Crumbly And Fluffy Angel Biscuits Recipe
Note- This post may contain affiliate links, we earn from qualifying purchases made on our website. If you make a purchase through links from this website, we may get a small share of the sale from Amazon and other similar affiliate programs.
There’s a reason why Angel Biscuits are called so, simply because they truly taste heavenly! These biscuits are the perfect accompaniment for your Thanksgiving dinner! So, let’s explore how these biscuits can be made at home to enjoy them with almost everything possible!
Anyone who is a beginner in the kitchen and wants to cook an amazing spread for their loved ones on Thanksgiving may get intimidated by the thought of baking. Trust me, even though I have been baking for a really long time, some recipes do intimidate me too.
But that truly is not the case with these angel biscuits! These biscuits are really easy to make, and if you are precise with your measurements, then there are hardly any chances of this recipe going wrong. That’s how full-proof this recipe is!
So, don’t let the thought of baking at home get the best of you, and surely try out this biscuit recipe at home! Plus, the best part is that they can be made ahead of time and stored for a decent amount of time, so that truly does make it even better.
Now, coming to the real question here that some of you may have wondered, why exactly are they called angel biscuits? Well, there is actually no hard and fast rule or reason behind this. Some say that when you open up one of these biscuits, they resemble angel wings, and others say that the combination of textures is what makes them heavenly, hence the name.
But regardless of what the reason may be, there is no doubt that these biscuits are truly divine and taste great with almost everything possible! So, in this article, you will find a complete guide on how to make them, from the equipment to the ingredients and method, and also the nutritional facts of the same. So, without further ado, let us dive right into this recipe! Happy baking to you!
What’s In The Post
What Equipment Will You Need To Make Angel Biscuits?
- Bowl – To make angel biscuits, you will need two bowls. One large bowl will be needed to mix the ingredients together to make the dough, whereas you will also need a small one to activate the yeast.
- Measuring Cups – We all know that one rule when it comes to baking is the precision of ingredients. So, to keep the amounts of the ingredients as precise as possible, you will need a set of measuring cups.
- Measuring Spoons – To measure out some of the ingredients that are needed in smaller quantities with precision, you will need a set of measuring spoons.
- Fork – To mix the butter in with the flour in a way that it doesn’t melt, you will need two forks if you have a pastry blender if you have one, or two knives. Basically, it depends on what you are comfortable working with.
- Dough Scraper – A dough scraper will be a handy tool to get all the ingredients together while making the dough and also to transfer the dough from one surface to another.
- Spatula – You can use a silicone spatula to get all the ingredients together while you are making the dough. This isn’t necessary, though, especially if you have a dough scraper handy.
- Rolling Pin – Usually, with biscuits, we tend to roll them out before cutting by patting them with our hands on the surface. However, here as we will be adding yeast to the dough and hence, it will form gluten and get stretchy; using a rolling pin will be much easier to roll out the dough.
- Round Cutter – To cut out the little biscuits, you will need a 2-inch round pastry cutter.
- Baking Tray – To bake the biscuits, you will need a large baking tray.
- Silicone Mat – Using a silicone mat will be much better than greasing the tray as it will reduce the chances of the biscuits sticking to the tray. Alternatively, if you have baking paper or parchment paper, you can also use that.
- Pastry Brush – Lastly, you will need a pastry brush to brush the tops of the biscuits with melted butter once they are out of the oven.
How Much Time Will You Need To Make Angel Biscuits?
| Preparation Time | Baking Time | Total Time |
| 25 Minutes | 15 Minutes | 40 Minutes |
What Ingredients Will You Need To Make Angel Biscuits?
- All-Purpose Flour – As angel biscuits are a combination of flaky biscuits and soft dinner rolls when it comes to their texture, all-purpose flour will work best. I would highly suggest not using bread flour as it has a very high gluten content and will not make the biscuits as flaky as we need them to be. This recipe requires 2 ½ cups of all-purpose flour to get a yield of 15 biscuits.
- Active Dry Yeast – The recipe for angel biscuits, due to their eventual consistency, use more than one leavening agent, one of them being yeast. The yeast will give them a soft texture and for this recipe, you will need two ¼ teaspoons of active dry yeast.
- Warm Water – We will be activating the yeast in warm water, which should have a temperature between 105- 115 degrees Fahrenheit. Two tablespoons of the same will be enough for this recipe.
- Sugar – Sugar is basically what helps the yeast activate, and for this recipe, you will need three tablespoons of regular granulated sugar.
- Baking Powder – As I had mentioned earlier, considering the type of texture that is desired out of these biscuits, we will be using more than one form of leavening agent. Baking powder will help the biscuits rise and for this recipe, you will need 1 ½ teaspoon of the same.
- Baking Soda – Baking soda is the final leavening agent added to this recipe, which will make the biscuits light and fluffy. ½ teaspoon of baking soda will be needed for this recipe.
- Buttermilk – Buttermilk is the acidic agent with which the baking soda will react, creating perfectly fluffy biscuits to enjoy. ¾ cup of buttermilk will be enough for this recipe.
- Shortening – Finally, it isn’t a baked good if there is no fat added to it, right? Here, we will be using shortening as it will help give the biscuits a crumbly texture, much better than what you would get by using butter. You will need ½ cup of shortening to get a yield of 15 angel biscuits.
- Salt – Last but not least, you will need ½ teaspoon of salt to enhance the flavors of these biscuits.
- Melted Butter – To give the biscuits a buttery flavor, we will be brushing some melted butter on top of them as soon as they are out of the oven. Two tablespoons of melted butter will be enough, but you can also skip this step if you would like.

Steps To Make Angel Biscuits
1. Activate The Yeast And Preheat The Oven
Whenever using yeast in a bread recipe, the first step is to activate it for a little while. For that, all you have to do is to add the yeast to the warm water in a medium bowl, along with half the sugar, mix it up and finally, set it aside for 10 minutes. Meanwhile, preheat the oven to 400 degrees Fahrenheit. Also, line the baking tray with a silicone mat or parchment paper and keep it aside.
2. Prepare The Dough
While your yeast is activating and the oven is preheating, you can start preparing the dough. For that, start by mixing the flour, the rest of the sugar, baking powder, baking soda, and also salt. Next, add the shortening and start cutting it into the dough with the help of a fork or a pastry blender.
The flour should end up looking like sand and be crumbly. Try not to use your hands to cut the shortening in as it will melt it, and eventually, your biscuits won’t be as flaky. Once the flour reaches the desired texture, add in the yeast mixture along with the buttermilk and mix the dough just enough so that it stops sticking to the sides of the bowl and forms a ball.
3. Knead And Roll
Once the dough stops sticking to the sides of the bowl and forms a ball, take it out and transfer it to a clean surface that is heavily dusted with flour with the help of a dough scraper. Then start kneading the dough, but not too vigorously, about 20 to 25 times. If the dough gets too sticky, you can sprinkle some extra flour, just enough to make sure that it doesn’t stick to your hands or the surface.
Once you are done kneading, start rolling the dough out with a rolling pin. The rolled dough should be about ½ inch thick. Then, dust the round cutter with some flour and start cutting out biscuits, and place them on the tray lined with the silicone mat. The scraps of the dough can be collected and rolled out again, out of which you can cut out more biscuits.
4. Bake And Serve
Once all the biscuits have been placed on the baking tray, you can put the baking tray in the oven and bake the biscuits for 12-15 minutes, until they have golden brown tops. Once done, take them out of the oven and brush them with the melted butter, remove them from the baking tray and either serve hot or store them for later!
What Can The Angel Biscuits Be Served With?
- With Condiments – These biscuits are so delicious that even if you just serve them with a bunch of condiments, they taste absolutely amazing! Some condiments that you can serve with angel biscuits are jams, honey, and nut butter.
- On A Charcuterie Board – These biscuits are really divine and can easily replace regular bread rolls on a charcuterie board. They taste exceptionally well with different types of cheeses and also cold cuts.
- On A Breakfast Platter – Again, looking for a replacement for plain old bread with your breakfast? Then angel biscuits are surely the way to go! Serve these up with crispy bacon and your choice of eggs to enjoy a hearty breakfast.
- With Thanksgiving Dinner – Angel biscuits also make a great addition to Thanksgiving dinner, as they pair really well with most food that is served for the same.
- With Fried Chicken – Fried chicken and biscuits are a southern staple. If you want to take this combination up a notch, try serving angel biscuits with fried chicken instead of regular buttermilk biscuits, and I can guarantee that you will love this combination!
Nutritional Information
| Calories | 167 kcal |
| Carbohydrates | 19 grams |
| Protein | 3 grams |
| Fat | 9 grams |
| Saturated Fat | 3 grams |
| Polyunsaturated Fat | 2 grams |
| Monounsaturated Fat | 3 grams |
| Trans Fat | 1 gram |
| Cholesterol | 5 milligrams |
| Sodium | 182 milligrams |
| Potassium | 41 milligrams |
| Fiber | 1 gram |
| Sugar | 3 grams |
| Vitamin A | 66 micrograms |
| Vitamin C | 0.001 milligrams |
| Calcium | 41 milligrams |
| Iron | 1 milligram |
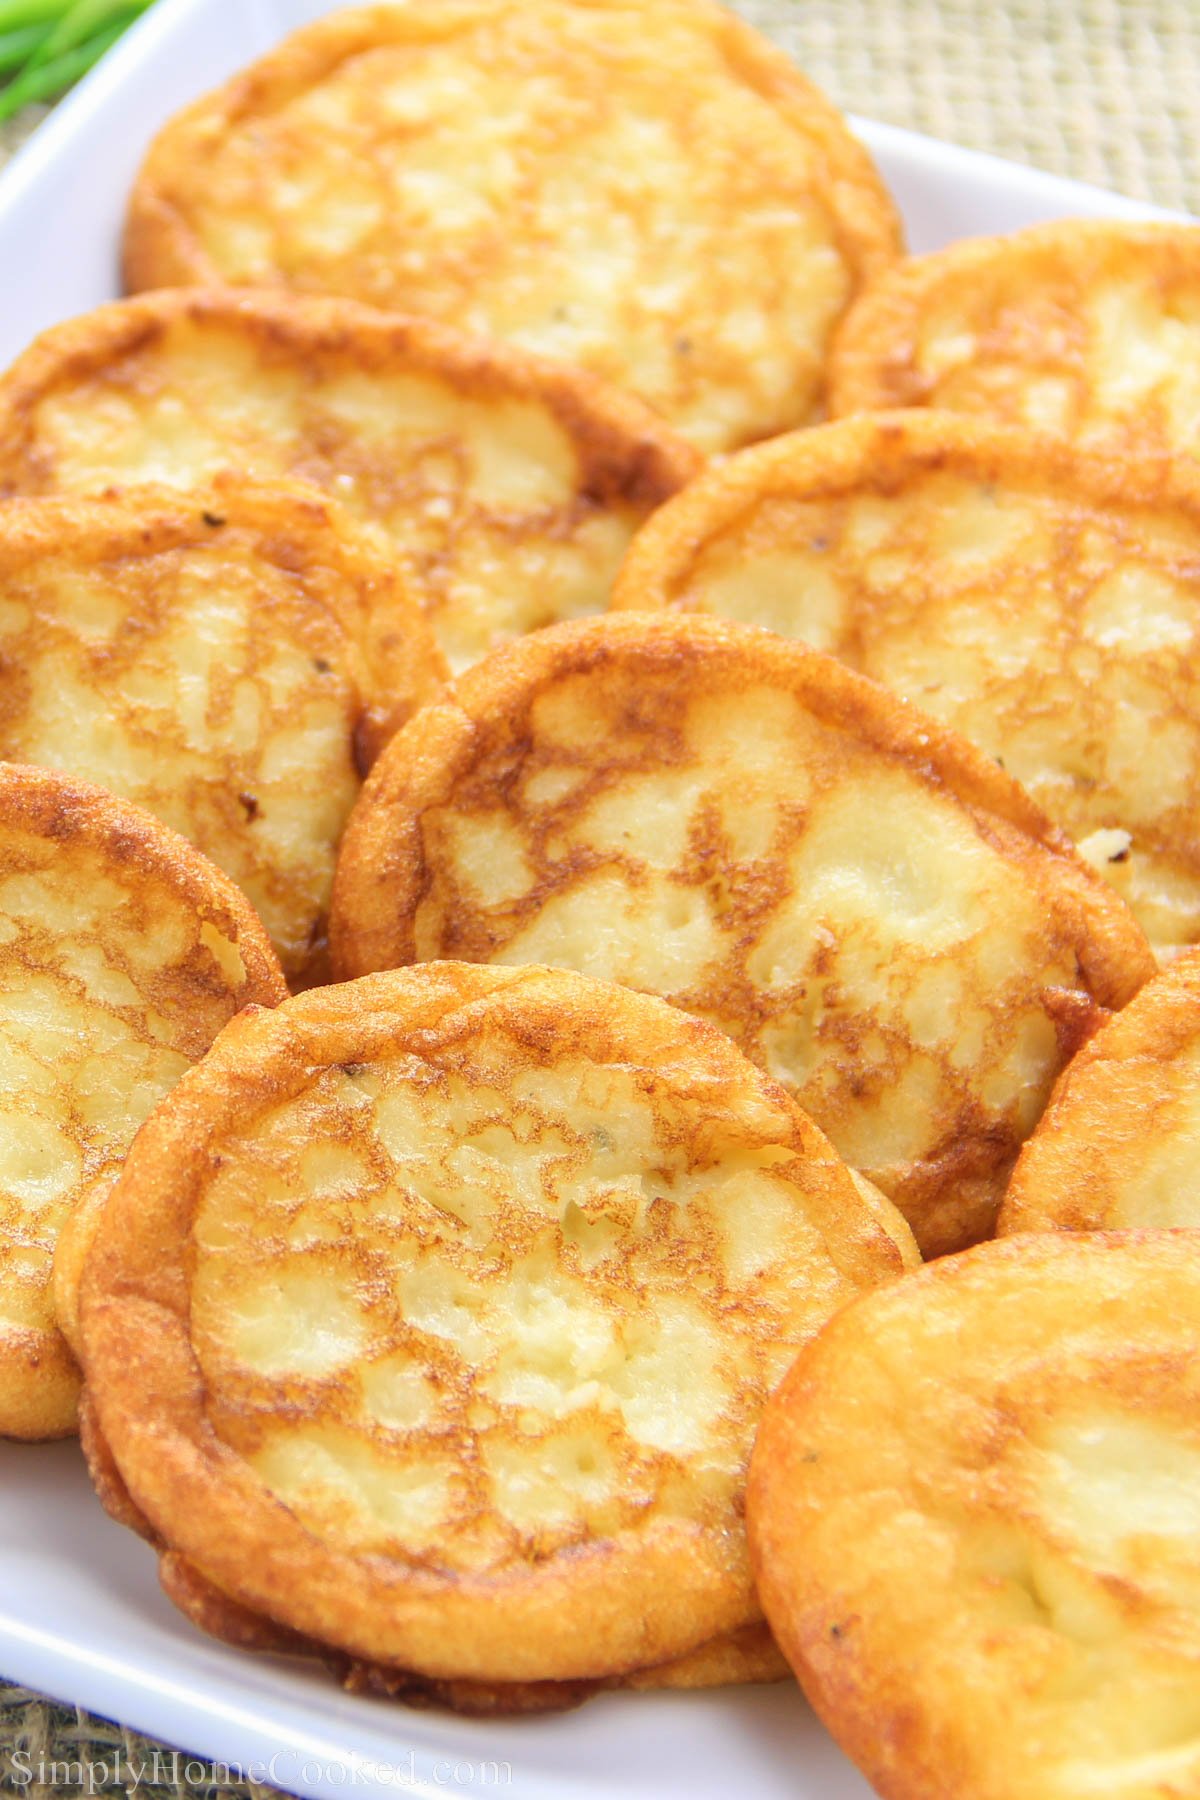
How Will The Angel Biscuits Look And Taste Like?
Wherever you bake initially, you always tend to get worried about how exactly the final product is supposed to turn out. Trust me; this happens to pro bakers, too, so you’re not the only one! Well, with technique and precision, there comes a lot of anticipation. So, let me help you understand what you should expect out of this recipe as a final product.
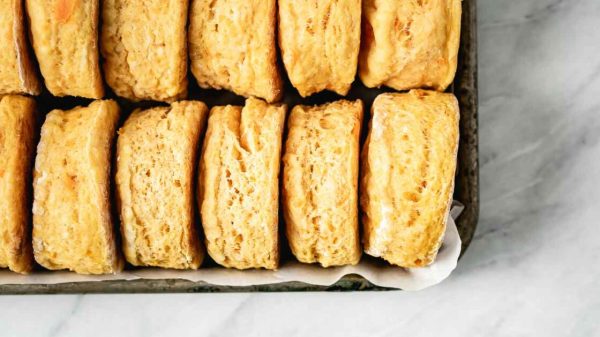
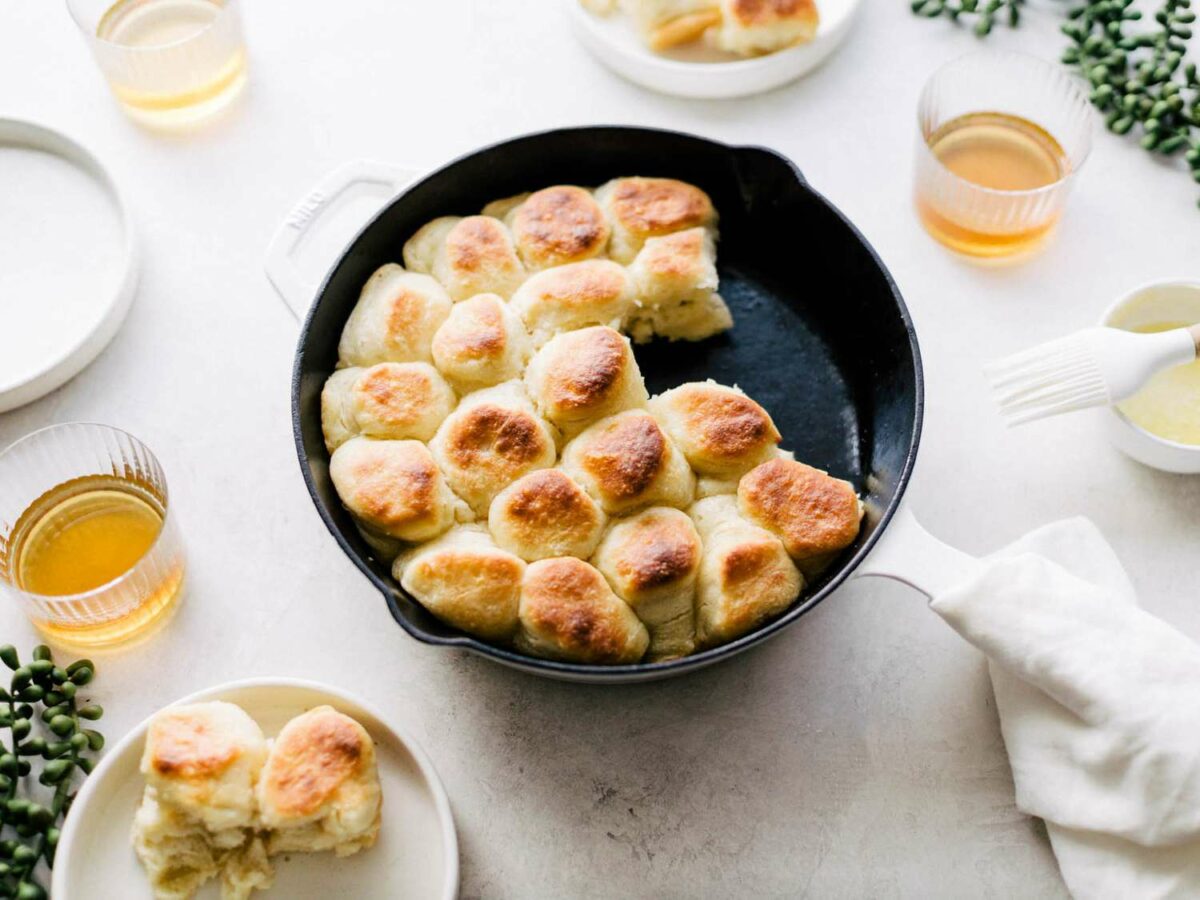
Talking about how the biscuits are supposed to look, they will look like a combination of buttermilk biscuits and regular dinner rolls. While they will have flaky tops as buttermilk biscuits do, they also will have a sheen and color similar to a regular dinner roll.
Talking about the flavor of these biscuits, even the texture will be somewhat between a buttermilk biscuit and a dinner roll. They will be soft and chewy like a bread roll but also crumbly and flaky like a buttermilk biscuit, creating the perfect balance.
Recipe Card
Angel Biscuits Recipe
#wprm-recipe-user-rating-0 .wprm-rating-star.wprm-rating-star-full svg * { fill: #e51838; }#wprm-recipe-user-rating-0 .wprm-rating-star.wprm-rating-star-33 svg * { fill: url(#wprm-recipe-user-rating-0-33); }#wprm-recipe-user-rating-0 .wprm-rating-star.wprm-rating-star-50 svg * { fill: url(#wprm-recipe-user-rating-0-50); }#wprm-recipe-user-rating-0 .wprm-rating-star.wprm-rating-star-66 svg * { fill: url(#wprm-recipe-user-rating-0-66); }linearGradient#wprm-recipe-user-rating-0-33 stop { stop-color: #e51838; }linearGradient#wprm-recipe-user-rating-0-50 stop { stop-color: #e51838; }linearGradient#wprm-recipe-user-rating-0-66 stop { stop-color: #e51838; }
-
Add the dry yeast to warm water along with half the sugar in a medium sized bowl and keep it aside.
-
Preheat the oven to 400 degrees and line the baking tray with a silicon mat and keep aside.
-
In a large bowl, mix together the flour, the rest of the sugar, baking powder, baking soda and salt.
-
Add the butter to the flour and start cutting it into the dough with a fork or pastry cutter. Once the butter is all mixed in, the flour should resemble the texture of sand.
-
Once the flour reaches the desired consistency, add in the yeast mixture and the buttermilk and mix the dough just until it stops sticking to the sides of the bowl.
-
Once the dough stops sticking to the sides of the bowl, transfer it to a clean, dusted surface and knead it lightly about 20-25 times.
-
Once you are done kneading the dough, roll it out until it is 1/2 inch thick.
-
Dust the round cutter with flour and start cutting out biscuits and placing them on the baking tray lined with a silicon mat.
-
Collect the scraps and roll the dough out again to cut out more biscuits.
-
Place the baking tray in the preheated oven and bake the biscuits for 12-15 minutes, until they have golden brown tops.
-
Once they are done, take them out of the oven and brush the tops with melted butter. Either serve hot or store for later!
Frequently Asked Questions (FAQs)
Why is shortening used in this recipe?
The reason behind using shortening in this recipe is that it will create a tender and flaky texture that is needed for these biscuits.
Why does this recipe need three leavening agents?
This recipe needs three leavening agents simply because all of them play a different role when it comes to the texture of these biscuits. The yeast will create a soft texture similar to a bread roll, the baking powder will help the biscuits rise, and the baking soda will react with the buttermilk and give them a crumbly texture.
Is it possible to over-knead an angel biscuit dough?
Yes, it is possible to over-knead an angel biscuit dough. If you knead the dough more than the required amount, it will end up forming a lot of gluten strands, which in turn will make the dough have a very bread-like texture and not crumbly at all.
Why can’t the shortening be rubbed in with hands?
The reason behind not rubbing the shortening in with your hands is that it will end up melting and will not form the air pockets needed for the biscuits to get a crumbly texture.
How long can angel biscuits be stored once they are baked?
Angel biscuits can be stored for a maximum of 3 days at room temperature.
Can angel biscuits be refrigerated?
They can be, but it is strongly recommended not to do as they will end up getting hard and lose their flaky texture.
Can self-raising flour be used instead of all-purpose flour for this recipe?
Yes, you can use self-raising flour instead of all-purpose flour for this recipe, but if you do, make sure you don’t add the baking powder.
Conclusion
Flaky, soft, and chewy, these angel biscuits are the perfect combination of textures and taste like they have been sent right out of heaven, hence, aptly named. These biscuits are also really versatile and can be served with a number of things, and are also exceptionally easy to make!